Account Settings & Administration
Last updated: September 2, 2026
Audience: Practice administrators and anyone responsible for team access, billing, or tracking test kits.
Settings has two tabs, reached from your initials in the bottom-left sidebar: User Settings (just you) and Account Settings (the whole practice).
1. User Settings — your own profile
Screenshot:
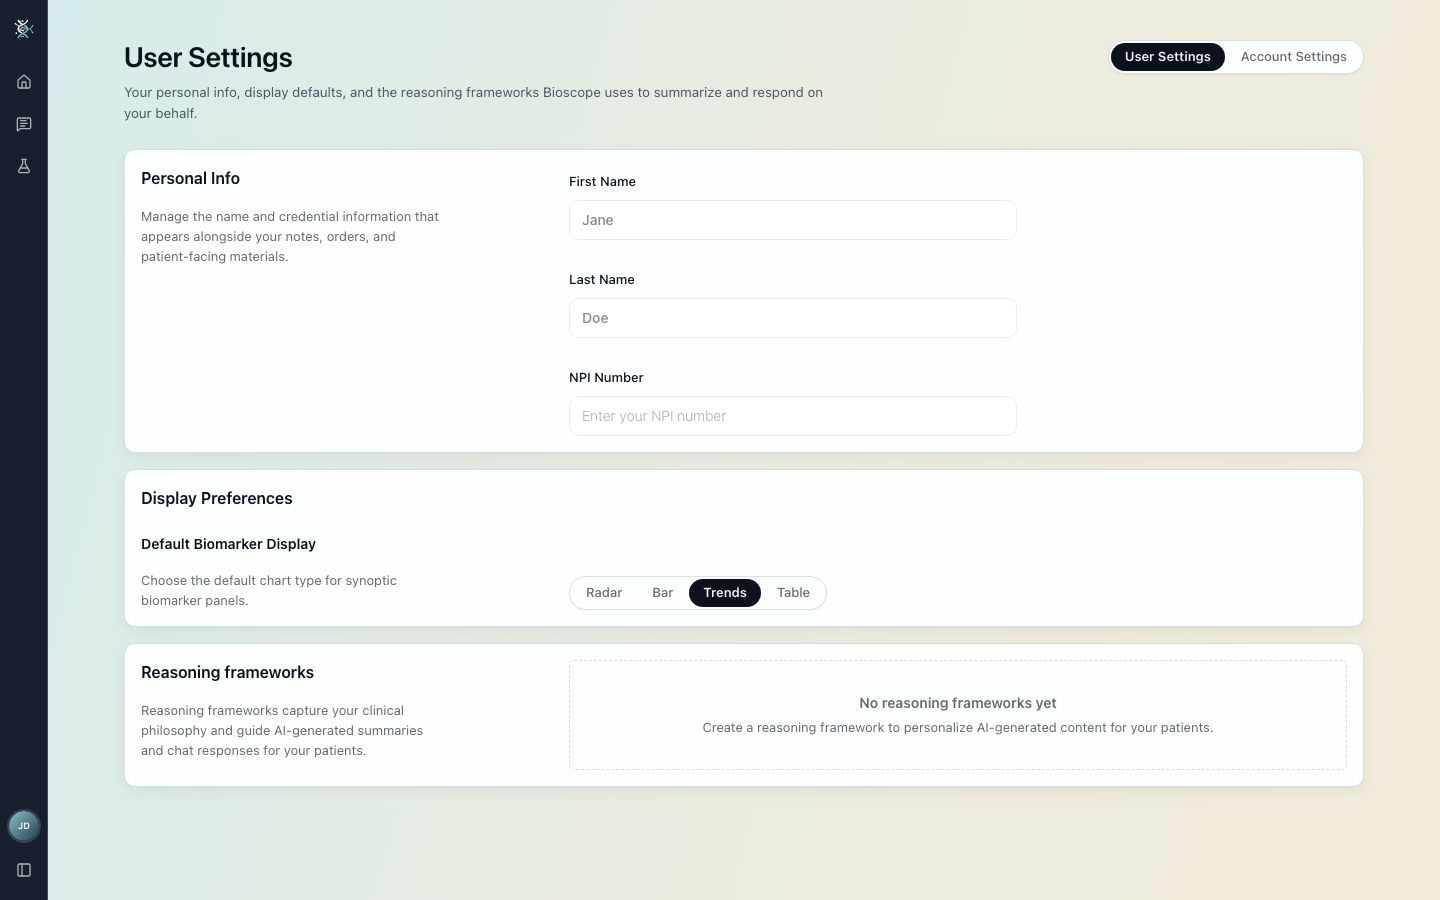
Personal Info
Your First Name, Last Name and NPI Number. These appear alongside your notes, orders, and any patient-facing materials, so it's worth completing them before you start sharing reports.
Display Preferences
Default Biomarker Display sets the chart type synoptic biomarker panels open with — Radar or Bar. It's a personal preference and doesn't change anyone else's view.
Reasoning frameworks
A reasoning framework captures your clinical philosophy so it guides AI-generated summaries and chat responses for your patients. If you haven't created one, this section reads "No reasoning frameworks yet."
Tip: A framework is the most direct way to make generated summaries sound like your practice rather than generic output.
2. Account Settings — the practice
Screenshot:
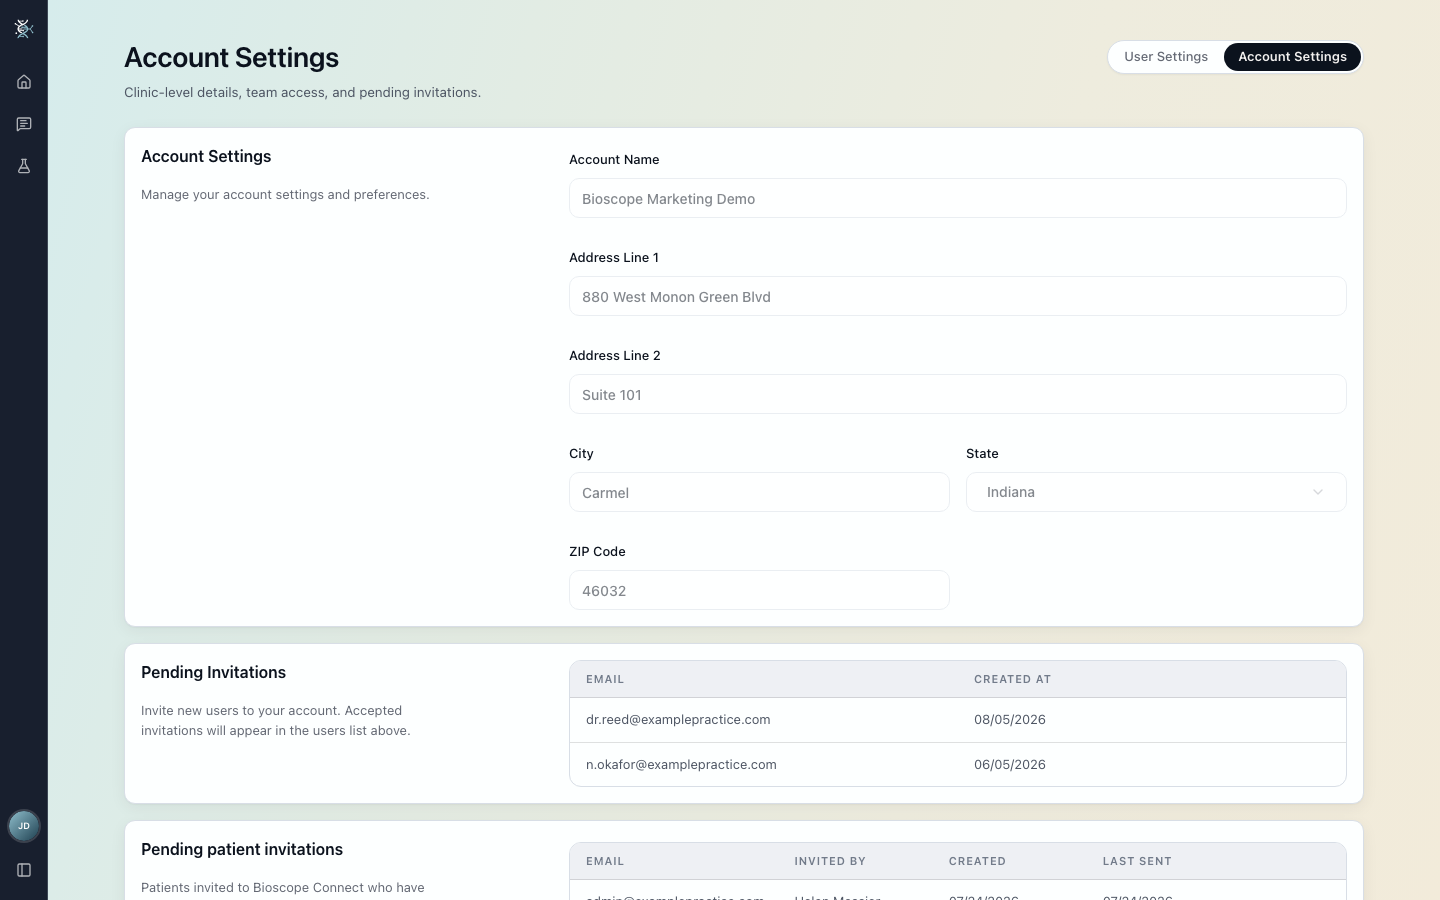
Clinic-level details, team access, and pending invitations.
Account details
Account Name and the practice address (Address Line 1 and 2, City, State, ZIP). The address matters beyond correspondence — it's the default for practice-level shipments.
Patient File Triage Mode
Setting | Behaviour |
|---|---|
Disabled | Ingested files are processed straight into the record |
Enabled | Adds a review step when a large number of files arrive at once — for example, when a patient is matched from an EHR |
With Triage Mode on, incoming files appear in the patient's Data › Data & files management › Files to preview and select for full ingestion, rather than landing all at once.
When to enable it: if you're connecting an EHR and expect large back-catalogues per patient, turn it on before you match patients. It's much easier than unpicking a bulk ingestion afterwards.
3. Adding and removing users
Inviting someone
Go to Settings → Account Settings.
Find Pending Invitations.
Enter the person's email address and send the invitation.
Accepted invitations move into the users list above the Pending Invitations table. Until then, the invitation sits in Pending Invitations with the date it was created.
Removing someone
Remove a user from the users list in Account Settings. If they haven't accepted yet, remove the row from Pending Invitations instead.
Please don't share logins. Each team member should have their own account. Shared credentials make it impossible to tell who recorded a note or shared a report with a patient, and they're the most common cause of lockouts. If someone needs access, invite them.
Pending patient invitations
A separate table lists patients invited to Bioscope Connect who haven't accepted yet, showing who invited them, when, and when the invitation was last sent. Resend from here, or from the patient's own Connect panel — see Managing Patients.
4. Tracking test kits and orders
Screenshot:
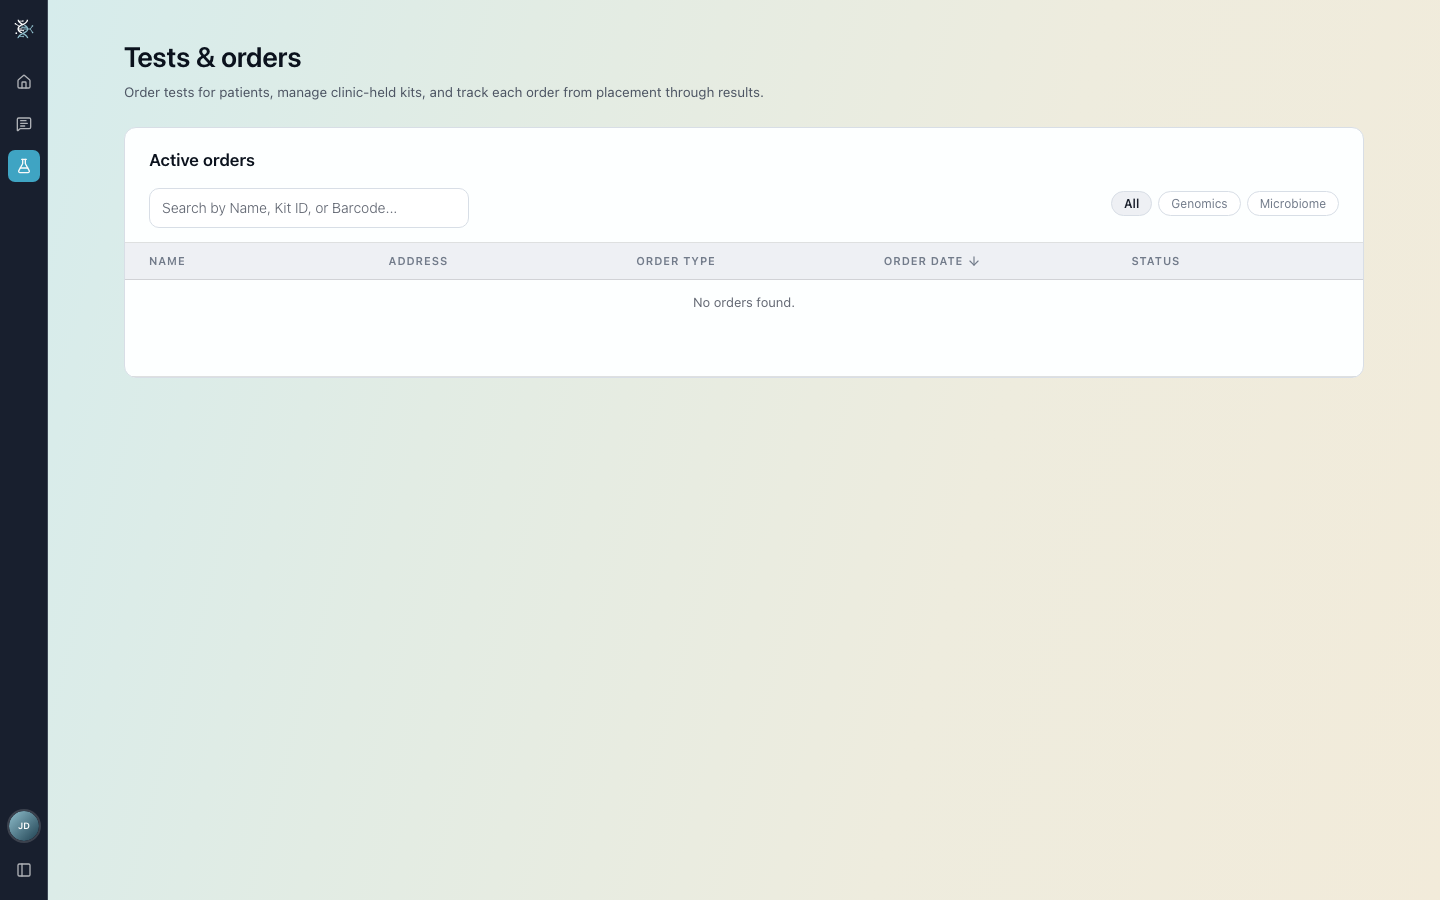
Tests & Orders in the left sidebar tracks every genomic and microbiome test you order, from requisition through to resulted. Flagged results surface automatically for review.
Column | What it shows |
|---|---|
Name | The patient the order belongs to |
Address | Where the collection kit ships |
Order Type | Genomics or Microbiome |
Order Date | When the order was placed |
Status | Where the order has reached |
Filter by All, Genomics or Microbiome. If nothing has been ordered yet the page reads "No orders found."
Where ordering happens
Tests are ordered as part of service package selection, on the Set Up Patient Access screen that follows adding a patient — not from this page. Tests & Orders is where you track what's already been ordered.
Kits ship to the patient's address on file, so check that address is right when you add the patient. The patient must provide consent for genetic testing.
Package gates: Bioscope-ordered omics require Advanced or above. A patient on Essential cannot add them à la carte — moving up a package is the only route. See Managing Patients.
5. Billing and payments
Billing is not managed inside the Bioscope app. There is no billing screen in Settings — payment methods, invoices and subscriptions are handled through the Stripe customer portal.
For updating a payment method, downloading invoices, or changing a subscription, see the Bioscope Billing & Payment Management guide.
I want to... | Where |
|---|---|
Update a card or payment method | Stripe customer portal |
Download an invoice | Stripe customer portal |
Change a patient's service package | Patient record — see Managing Patients |
Understand what a package includes | Managing Patients §2 |
If you can't reach the billing portal, contact your Bioscope CSM or support@bioscope.ai rather than waiting — access is granted per account.
Quick Reference
I want to... | Go here |
|---|---|
Update my name or NPI | Settings → User Settings → Personal Info |
Set my default chart type | Settings → User Settings → Display Preferences |
Make summaries sound like my practice | Settings → User Settings → Reasoning frameworks |
Change the practice name or address | Settings → Account Settings |
Review files before they're ingested | Settings → Account Settings → Patient File Triage Mode |
Invite a colleague | Settings → Account Settings → Pending Invitations |
Remove a colleague | Settings → Account Settings → users list |
See which patients haven't accepted Connect | Settings → Account Settings → Pending patient invitations |
Track a test kit | Tests & Orders (left sidebar) |
Order a test | Add a patient → Set Up Patient Access |
Update billing | Stripe customer portal — see Billing & Payment Management |
Need help? Contact your Bioscope CSM or email support@bioscope.ai.
This information is for clinical decision support and does not replace clinical judgment.
Last updated: August 2026